Master Stripe Affiliate Marketing | Build Your System Today

Deciding to build your own Stripe affiliate marketing system instead of using an off-the-shelf platform is a major power move. It’s about taking back control. When you ditch the hefty monthly fees and rigid structures of third-party services, you can craft a commission model that truly fits your business—not someone else's template. This puts you firmly in the driver's seat.
Why Build a Custom Stripe Affiliate Program?

The choice between a pre-built platform and a custom Stripe integration isn't just about code; it's a strategic business decision. While third-party tools promise a quick setup, that convenience often comes with hidden costs and limitations that can really start to chafe as you grow.
A custom system built on Stripe's powerful API flips that entire dynamic. You get complete ownership over your data, your brand, and most importantly, your money.
Take Full Control of Your Affiliate Experience
When you build it yourself, you control every single pixel of the affiliate’s journey. This is huge. It means you can create a sleek, on-brand dashboard that lives right inside your own product, not on some clunky, unfamiliar third-party domain. For SaaS companies, that kind of seamless integration is pure gold. For a deeper dive on this, check out our guide on the finer points of https://refgrow.com/blog/saas-affiliate-marketing.
This control extends right down to the commission logic. You’re no longer stuck with a one-size-fits-all model. Instead, you can easily set up:
- Recurring Commissions: Pay affiliates for every single subscription renewal, not just the first sale. This is a game-changer for keeping partners motivated.
- Tiered Structures: Create performance-based tiers that automatically reward your top affiliates with higher commission rates.
- Product-Specific Rates: Want to offer 25% on one plan and 15% on another? No problem. You can assign different commissions for any product or subscription level you offer.
Owning your affiliate program means owning your growth engine. You're not just renting a service; you're building a business asset that adapts to your needs, not the other way around.
Cost-Effectiveness and Scalability
Let's talk money. Yes, there's an upfront cost to build a custom system, but it almost always pays for itself in the long run. Most third-party platforms hit you with a double whammy: a fixed monthly fee plus a percentage of the revenue your affiliates generate. As you scale, those fees can quietly eat away a huge chunk of your profit.
A custom build gets rid of those endless recurring costs. Suddenly, your program's expenses become predictable. It’s a model that scales beautifully—whether you have 10 affiliates or 10,000, your core costs don't balloon. This ensures your program’s profitability grows right alongside its success.
And the affiliate marketing industry is absolutely exploding, with projections showing it will become a $48 billion market by 2027. Building a scalable system now positions you to grab your piece of that pie without getting penalized for your own growth.
Custom Stripe System vs Third-Party Platform
To put it all in perspective, here's a quick comparison of what you're really choosing between.
| Feature | Custom Stripe Build | Third-Party Platform |
|---|---|---|
| Branding & UX | Fully integrated and customizable. Your brand, your rules. | Limited branding, often hosted on their domain. |
| Commission Logic | Infinitely flexible (tiers, recurring, product-specific). | Restricted to pre-set options and plans. |
| Cost Structure | Upfront development cost, low ongoing operational fees. | Monthly subscription + percentage of revenue. |
| Data Ownership | You own 100% of your data, forever. | You're renting access; data can be hard to export. |
| Scalability | Scales affordably as your program grows. | Costs increase directly with your revenue. |
| Setup Speed | Slower initial setup requiring development resources. | Fast, out-of-the-box setup. |
Ultimately, the choice comes down to control versus convenience. For businesses serious about long-term growth and building a proprietary marketing channel, the custom route transforms an affiliate program from a recurring expense into a powerful, permanent asset.
Laying the Technical Groundwork
Before you write a single line of code, let's talk strategy. A successful Stripe affiliate marketing program isn't just about the tech; it's about building a solid foundation first. Think of it like building a house—you need a detailed blueprint before you start pouring concrete. This initial planning, from your Stripe setup to your database design, is what makes your tracking bulletproof down the road.
The whole affiliate journey, from the moment someone signs up to be a partner to when they get paid, follows a pretty clear path. Your job is to build the system that supports this flow.
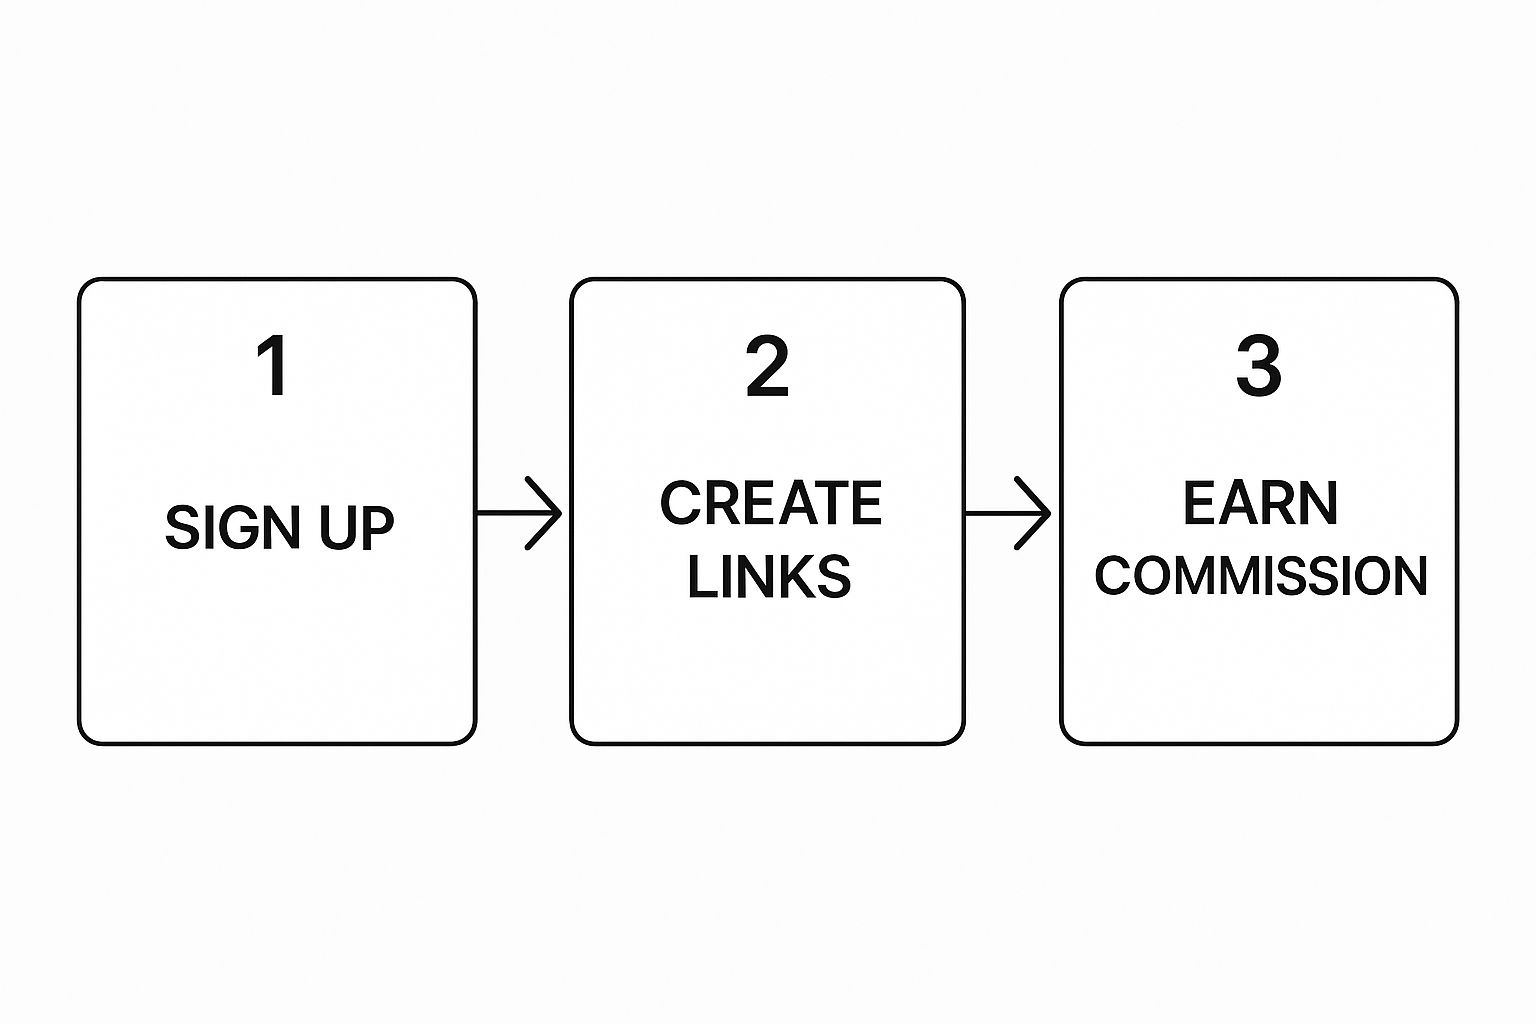
This diagram really nails the core lifecycle: an affiliate signs up, gets their unique link, drives traffic, and earns a commission. This is the exact process we're about to build.
First things first, get acquainted with your Stripe dashboard. You'll need to locate your API keys—the publishable key for the front end (what your users interact with) and the secret key for your server (keep this one safe!). I can't stress this enough: always start in Test Mode. It’s a complete sandbox environment that lets you run fake transactions, test your logic, and break things without costing you a dime.
How to Structure Your Affiliate Database
Your database is the brain of this whole operation. Get the structure right now, and you'll save yourself a world of pain later. You don't need a super complex setup; a few well-designed tables can handle everything.
At its core, you're tracking three main things: your affiliates, the customers they bring you, and the commissions they earn. Each gets its own table, all linked together.
Here’s a simple, effective schema I've used before:
affiliatesTable: This is your partner roster. You'll need columns for their name, email, a unique referral code (likeref_code), and their payout info, such as a Stripe Connect account ID.referralsTable: This table is the glue connecting an affiliate to a new customer. It just needs to store theaffiliate_id, the new customer'scustomer_idfrom Stripe, and the signup date.commissionsTable: Every time a payment comes through that needs a commission, a new row gets added here. It should track theaffiliate_id, thereferral_idit came from, the original Stripecharge_id, the commission amount, and astatus(I usually use 'pending', 'paid', or 'void').
With this structure, you can easily trace a commission back to a specific payment, which came from a specific customer, who was referred by a specific affiliate. It’s clean and auditable.
The Magic of Stripe Metadata
Okay, so how do you actually connect a new customer to the right affiliate during checkout? The secret weapon here is Stripe's metadata feature. It's a brilliantly simple way to attach your own custom data to almost any object in Stripe, from customers to payments.
This is what makes your tracking airtight. When someone signs up through an affiliate link, your code will attach the affiliate's unique ID directly to the customer's profile as they're created in Stripe.
Think of metadata as a digital sticky note. You're attaching the affiliate's ID directly to the customer's profile inside Stripe. This note stays there forever, ensuring every future payment from that customer can be correctly attributed back to the original referrer.
For instance, when your code creates a new Stripe Customer, you’ll just include a little extra piece of information, like: metadata: { 'referring_affiliate': 'aff_123xyz' }.
This one move is the cornerstone of the whole system. Later, when a webhook from Stripe hits your server telling you that customer just made a payment, you can simply pull up that customer's data, read the metadata, and see 'aff_123xyz'. Instantly, you know who to credit.
It’s an elegant solution that keeps you from having to manage a separate, complex tracking system. By embedding the referral info right inside Stripe, you create a single source of truth for every single transaction. This gets you perfectly set up for the next step: automating the whole thing.
Automating Tracking With Stripe Webhooks

If metadata is the digital sticky note, then webhooks are the automated messenger service that brings your entire Stripe affiliate marketing program to life. Instead of you manually checking for new sales, Stripe proactively sends a notification—a webhook—to your application the instant a payment happens. This is the secret sauce for real-time, hands-off tracking.
Here’s a simple way to think about it: your application has an "inbox" (a specific URL endpoint) waiting for messages. When a customer pays, Stripe sends a message to that inbox saying, "Hey, a payment just happened. Here are the details." Your application then opens that message, reads the information, and kicks off the right actions, like creating a new commission record in your database.
This automation is what graduates your custom build from a simple tracking script to a powerful, self-sustaining system. It's how you’ll handle recurring subscription payments, refunds, and other critical events without lifting a finger after the initial setup.
Configuring the Right Stripe Events
You don't need a notification for every single thing that happens in Stripe. That would be incredibly noisy and inefficient. The goal is to listen only for the events that directly impact your affiliate commissions.
Here are the essential events you’ll want your webhook endpoint to pay attention to:
checkout.session.completed: This is the big one for one-time sales. It fires the moment a customer successfully completes a Stripe Checkout session, signaling a new conversion.invoice.payment_succeeded: For any SaaS or subscription business, this is non-negotiable. It fires every single time a recurring invoice gets paid, allowing you to generate ongoing commissions for your affiliates.charge.refunded: You absolutely need to know when money goes back to the customer. This event tells you a refund has been processed so you can void or "claw back" the associated commission.
By focusing on just these events, you create a clean, efficient process that captures every piece of data you need to manage commissions with precision.
Building and Securing Your Webhook Endpoint
Creating the endpoint itself is pretty straightforward. It’s just a route in your web application designed to accept POST requests from Stripe. But simply creating it isn't enough—you have to secure it. If you don't, anyone could send fake data to your endpoint and trick your system into paying out fraudulent commissions.
This is where Stripe's webhook signatures come in. When Stripe sends a webhook, it includes a special header called Stripe-Signature. Your application uses this signature, along with a unique "signing secret" from your Stripe dashboard, to prove that the message is genuinely from Stripe and hasn't been messed with.
Never trust a webhook request until you have verified its signature. This is the single most important security measure for your affiliate system. Ignoring this step leaves your endpoint vulnerable to malicious attacks that can cost you real money.
Another critical concept is idempotency. It's a fancy word that simply means your system won't process the exact same notification more than once. Network hiccups can sometimes cause Stripe to resend a webhook. Your logic has to be smart enough to recognize a duplicate event (by checking the unique event ID Stripe provides) to avoid paying out double commissions for a single sale. This small detail prevents a world of accounting headaches.
Given the sheer scale of Stripe’s operations, this security is non-negotiable. The platform’s payment processing volume hit an estimated $1 trillion in 2023, a massive jump from $817 billion the previous year. With over 1.22 million live websites using its services, Stripe is a foundational piece of e-commerce, making its security protocols essential for anyone building on top of it. You can see more about these trends in Stripe's user base on helplama.com.
A Practical Node.js Example
Let's look at a simplified example of what this endpoint logic might look like in a Node.js application using the Express framework. This snippet shows how to receive the event, verify the signature, and then handle a successful payment.
// This is a simplified example
const express = require('express');
const stripe = require('stripe')('your_stripe_secret_key');
const app = express();
// Your Stripe webhook signing secret
const endpointSecret = 'whsec_...';
app.post('/stripe-webhooks', express.raw({type: 'application/json'}), (request, response) => {
const sig = request.headers['stripe-signature'];
let event;
try {
event = stripe.webhooks.constructEvent(request.body, sig, endpointSecret);
} catch (err) {
response.status(400).send(Webhook Error: ${err.message});
return;
}
// Handle the event
switch (event.type) {
case 'invoice.payment_succeeded':
const invoice = event.data.object;
// Logic to find customer's metadata for affiliate ID
// and create a commission record in your database.
console.log('Recurring payment succeeded for:', invoice.customer);
break;
// ... handle other event types
default:
console.log(Unhandled event type ${event.type});
}
// Return a 200 response to acknowledge receipt of the event
response.send();
});
In this code, we first verify the event's authenticity. If it’s valid, we use a switch statement to check the event type. If it's invoice.payment_succeeded, we would then plug in our custom logic to look up the customer, check their metadata for a referring affiliate ID, calculate the commission, and save it to our commissions table. This automated loop is the heartbeat of a truly scalable affiliate program.
Building Your Commission and Payout Logic
Now that your system is wired up to Stripe, the data is flowing. This is where things get interesting. You're about to translate those raw payment events into real, tangible earnings for your affiliates. This isn't just a technical step; it's where you define the entire financial engine of your Stripe affiliate marketing program.
The great part about building this yourself is the freedom you have. You're not stuck with a one-size-fits-all commission structure. You can design a system that truly reflects your business model and incentivizes the kind of partners you want to attract.
Choosing Your Commission Model
First things first, how are you going to reward your affiliates? There are a few tried-and-true models, and the right one really depends on what you're selling.
One-Time Payouts: This is as straightforward as it gets. An affiliate drives a sale, you pay them once. It's the perfect model for one-off products like e-books, online courses, or physical goods. Simple, clean, and easy for everyone to understand.
Recurring Commissions: If you run a SaaS or any other subscription-based business, this is your secret weapon. The affiliate doesn't just earn a commission on the first payment—they get paid for every single renewal for as long as that customer sticks around. This is a massive incentive for affiliates to bring you high-quality, long-term customers, not just quick sign-ups.
Tiered Structures: Want to light a fire under your top performers? A tiered model is the way to go. You can set up performance-based rewards, like bumping an affiliate's commission rate after they refer 20 customers in a month. It adds a bit of gamification and keeps your best partners motivated to push even harder.
To make this work, your database needs to be flexible. For example, you can simply add a commission_rate column to your affiliates table. When a payment webhook comes in, your logic just has to look up that specific affiliate's rate to calculate what they've earned. This gives you incredibly granular control.
Automating Commission Creation
Every time a successful payment webhook—like checkout.session.completed or invoice.payment_succeeded—hits your server, your system needs to jump into action. It's a clean, three-part database dance.
Find the Affiliate: Your code will grab the customer ID from the webhook. From there, you'll query Stripe's API for that customer's details to pull the
referring_affiliateID you tucked away in their metadata.Calculate the Dough: With the affiliate identified, you'll fetch their commission rate from your database and calculate their earnings based on the total payment amount.
Log the Commission: Finally, you create a new record in your
commissionstable. This is your official ledger. Make sure it includes theaffiliate_id, the Stripecharge_id, thecommission_amount, and a status—which should always start aspending.
Why a
pendingstatus? It's your safety net. This allows you to hold commissions during your product's refund window (say, 30 days). You absolutely want to avoid paying a commission for a sale that gets refunded a week later. It saves you from having to chase down affiliates for clawbacks, which is a conversation nobody enjoys.
Managing Affiliate Payouts
Logging commissions is one thing, but actually getting the money into your affiliates' bank accounts is the other half of the equation. As you grow, sending payments manually is a recipe for disaster. This is where you can lean heavily on Stripe's amazing infrastructure. You've got two great options here.
The most integrated route is Stripe Connect. It lets you onboard affiliates as "connected accounts" under your own platform. You can then programmatically push funds from your balance directly to theirs. It’s incredibly seamless and takes a huge compliance and reporting burden off your shoulders.
For more direct control, you can use the Stripe Payouts API. This approach means you'll be responsible for collecting and verifying your affiliates' bank details, but it gives you the power to build a completely white-labeled experience. You can easily create batch payouts on a schedule that works for you, like the first week of every month.
No matter which method you choose, setting a minimum payout threshold (like $50 or $100) is a non-negotiable best practice. It stops you from wasting time and fees on a bunch of tiny, inefficient payments. Your system can just let commissions accumulate until an affiliate's payable balance hits your threshold. Smart management is what separates a good program from a great one, and we cover more strategies for how to manage an affiliate program effectively in our other guides.
The central role of Stripe in getting people paid now extends far beyond e-commerce. It's become a critical piece of the puzzle for creators on social media. For example, to even qualify for X’s ad revenue sharing program, creators are required to have a Stripe account. It just goes to show how fundamental this infrastructure is to the entire creator and affiliate economy.
Ultimately, your commission and payout logic is the heart of your affiliate program. When you build a system that's clear, automated, and fair, you create a foundation of trust that will help you attract—and keep—the best partners out there.
Testing and Launching Your Affiliate Program

This is it—the moment of truth. Moving from a development environment to a live system is the most critical step for your entire Stripe affiliate marketing program. A smooth launch is never an accident; it's the result of being methodical and downright paranoid during testing.
If you rush this part, you're setting yourself up for tracking errors, paying out wrong commissions, and losing the trust of your brand-new affiliates right from day one. This is where you need to put your system through its paces and try to break it, so your users don't have to.
Simulating Real-World Scenarios in Test Mode
Before a single real dollar is processed, your goal is to validate the entire affiliate journey—from the very first click to the final commission being recorded. Thankfully, Stripe’s test mode is a fantastic sandbox that lets you do exactly this without any financial risk.
I recommend building a checklist to cover every possibility. You're not just looking for successes; you're actively trying to find the failure points.
- The Happy Path (Successful Purchase): Use a standard test card to complete a checkout. Does the
checkout.session.completedwebhook fire? Is areferralcreated? Is acommissionlogged with the right amount and a 'pending' status? - When Payments Fail: Use one of Stripe's test cards that simulates a decline. The most important thing here is what doesn't happen. You must confirm that no commission record is created.
- Recurring Revenue (Subscriptions): If you have subscriptions, simulate a renewal payment. Check that your
invoice.payment_succeededlogic correctly pulls the affiliate ID from the customer's metadata and generates a new commission. - Handling Refunds and Disputes: After a successful test payment, go into your Stripe dashboard and issue a full or partial refund. Your system should catch the
charge.refundedwebhook and either void or adjust the commission correctly.
Thorough testing is absolutely essential. To make this phase truly robust, it helps to think like a professional tester; a good guide on understanding QA roles and responsibilities can give you a solid framework for this process.
Validating Your Data and Dashboard
While you're running through these scenarios, keep your database open. Look at the raw data. Is it clean? Are the connections between affiliates, referrals, and commissions being created properly? This data is your source of truth, so its integrity is non-negotiable.
At the same time, put yourself in your affiliate's shoes. What will they see? Your first affiliate dashboard doesn't need to be fancy, but it absolutely must be clear.
Your affiliate dashboard at launch can be simple, but it has to be transparent. It should clearly show their unique referral link, total clicks, conversions, pending commissions, and paid commissions. Transparency from the start builds immediate trust.
This dashboard is the front door to your program. Giving your partners this core information from day one empowers them and dramatically cuts down on the support questions you'll get later. If you're looking for a wider view on setting up your program's structure, our complete guide on https://refgrow.com/blog/how-to-start-an-affiliate-program is a great resource.
Flipping the Switch to Live Mode
Once you've run every test you can think of and you’re confident the system is solid, you're ready to go live. The technical part is surprisingly simple: just swap your Stripe test API keys for your live keys.
Don't forget the final—and most commonly missed—step: update your webhook endpoint in the Stripe dashboard to point to your live production server.
After you've made the switch, I always recommend running one last real transaction with a small amount. It's the final sanity check. Once that's confirmed, you're officially ready to open the doors and start onboarding your first affiliates.
Got Questions? Let's Talk Through the Common Hurdles
Building a custom affiliate program is incredibly rewarding, but you're bound to run into a few common questions along the way. I've seen these pop up time and time again with developers. Getting these pieces right from the start is the difference between a robust, fair system and one that causes constant headaches.
Let’s walk through the big ones.
What Do I Do About Refunds and Chargebacks?
This is probably the most critical question. If you don't account for refunds, you’ll end up paying affiliates for money you had to give back to the customer. That's a quick way to burn through your cash.
The key is to use Stripe’s webhooks. Specifically, you need to listen for the charge.refunded event. When that webhook hits your server, your code should find the original transaction, locate the commission you recorded for it, and then mark that commission as void or clawed back.
Pro Tip: A smart move is to implement a "pending" period for all commissions. For example, hold commissions for 30 or 60 days—whatever your refund window is. This way, you only pay out commissions on sales that are final, which keeps your books clean and avoids awkward conversations with affiliates about taking money back.
Can I Offer Different Commission Rates to Different Affiliates?
You absolutely can, and you should! This is one of the biggest advantages of a custom build—you’re not stuck with a one-size-fits-all rate.
A straightforward way to handle this is to add a commission_rate_override column to your affiliates table in your database. When your commission logic runs, it first checks if a value exists in that override field. If it does, great—use that custom rate. If it's empty, it just uses your default program-wide rate.
You can take this even further. Apply the same logic to a products table to set different rates for specific products. This gives you the power to incentivize affiliates to push higher-margin items or to reward your top partners with a more generous cut.
How Do I Reliably Track the First Click?
First-click attribution is the bedrock of any affiliate program. If affiliates don't trust your tracking, they won't promote you. The classic, battle-tested method here is browser cookies.
Here’s the play-by-play:
- A potential customer clicks an affiliate link, like
yoursite.com?ref=affiliate123. Your app immediately grabs thatrefparameter from the URL. - You then set a cookie in the user's browser that stores the affiliate's ID (
affiliate123). Make sure this cookie has an expiration date that matches your program's attribution window (e.g., 30 days). - When that user finally buys something—whether it's an hour or two weeks later—your backend code looks for that cookie. It finds the affiliate's ID and passes it along as metadata in the Stripe Checkout session.
This creates a clean, reliable link from that initial referral click all the way to the paid conversion. It’s a core piece of building a Stripe affiliate marketing system that people can trust.
Ready to launch a native affiliate program without the technical overhead? Refgrow lets you embed a fully customizable affiliate dashboard directly into your SaaS with a single line of code. Skip the build and start growing today. Learn more about Refgrow.